The below method statement is helpful for the building civil finishing works for any kind of project.
Minimum site safety requirements are Safety Glasses, Safety Footwear, Helmet and High Visibility Vest. Any additional PPE as per the task risk assessment.
Solid brick, Cement, Sand and other materials should be arranged into groups at appropriate place to gain safe and clean work place.
Portable ABC fire Extinguisher firefighting equipment with required number will be available. Maximum speed for vehicles inside the project premises is 20kmph.
Warning Signs and caution tapes to be placed around the working area. Ensure that the ground is level before scaffold erection. Life line will be used where it is necessary.
For working at height safety harness will be used all the time and all working scaffolds and catwalks will be secured with kick plate and mid rails.
Below is list of necessary tools and equipment, all equipment to be in good condition and inspected by safety supervisor:
- Concrete Mixer Machine
- Survey
- Grinder 5″
- Grinder 9″
- Electrical Hand
- Hand Tools
Cement Solid Brick Work Method
Cement solid brick work will be of the type and thickness approved by the owner and will be properly coordinated with other work.
The source of supply for materials will not be change after the finishing works has started.
Cement solid brick units will be true to size, without cracks, chips and splits.
The Contractor could start using the design mix after getting the owner approval.
Materials will be selected as per the contract and it will be tested according to the inspection and test plan approved by the owner.
All the tests for mortar will be performed as per the test plan approved by the owner.
Contractor will submit all solid brick accessories to the owner for approval.
Cement solid brick will be wetted before laying.
All cement solid brick will be laid plumbed, leveled and accurately spaced.
The cement solid brick will be laid on full mortar bedding and in such a way that no crakes are formed between the cement solid bricks and the mortar at the time the cement solid brick is placed.
Provide the concrete lintel over all opening in concrete unit masonry.
Lintels will be cast-in place and reinforced with longitudinal bars at the bottom, the sizes of which will be as per approval by the owner.
Cement and Sand Mortar Plaster Finish
Cement will be stored off the ground and away from damp surfaces.
The contractor will start the work using the design mix after getting the owner approval.
All materials will be selected as per the contract and it will be tested according to the test plan approved by the owner
Tests for mortar will be performed as per the test plan approved by the owner.
The Contractor will submit all plaster accessories to the owner for approval.
Plaster Application Procedure
Surfaces will be cleaned of dust and other foreign matter.
Before the plaster work is started, masonry surfaces shall be wetted thoroughly with clean water.
Apply dash coat on masonry surfaces with approved design mix.
Metal corner beads and other accessories will be checked carefully for alignment before work is started.
Plastered surfaces will be smooth and free from rough area, cracks and blemishes.
Raised Floor and Anti-Static Carpet Tiles Installation
Raised access flooring is a complete portable assembly of modular anti-static carpet tiles on an elevated support system (understructure) forming an accessible under floor cavity to accommodate electrical and mechanical services.
The contractor will provide manufacturer’s standard modular anti-static carpet tiles of size and construction indicated, that are interchangeable with other standard floor tiles, easily placed and removed without disturbing adjacent panels by one person using portable lifting device.
The contractor will submit raised floor system to the owner for the approval.
Contractor will provide manufacturer’s standard galvanized steel pedestal assembly including square galvanized steel base and the column with provisions for height adjustment.
Provide galvanized steel cap (head).
Protect steel components against corrosion with manufacturer’s standard paint finish.
Squaring room needed before starting.
The surveyor will mark the exact level on perimeter of room.
The contractor will install steel pedestal every 60cm in both directions depending on the approval shop drawing.
Install the head above pedestals to reach the height adjustment.
Before installing the tiles Contractor will make sure that all mechanical, electrical and ITC items have been installed inspected and tested.
Pulling a string between walls at final finishing installing tiles.
Checking level of tile using spirit level.
Porcelain Floor Tiles Installation
Tiles work will not start until the plumbing, electrical works and other trades have been completed and tested.
The tiles should be protected before the start of any other activities in the area.
Porcelain floor tiles will be 400*400*9mm and as per the approved sample.
All tiles will be of first class quality and of uniform size and even surface, free from warps, chipped corners and other imperfections affecting on quality.
Colors and quality will be subject for approval of the owner. The contractor will submit materials as per the owner approval requirements.
Installation Method
Surfaces under porcelain tiles will be cleaned.
Provide clean sand under porcelain tiles.
Tiles will be soaked in clean water for about 1/2 hour before setting them.
Squaring room needed before starting the tiling works.
The porcelain floor tiles will be installed using approved mix design mortar.
Set the tiles in uniform position. Use plastic spacers for uniform spaces between the adjacent tiles.
Check the level of tiles using spirit level.
Restrict access when tiles are freshly laid.
Lay the approved carpet on porcelain floor for prayer room etc.
Grouting Work
Tiles will be wetted before applying grout.
Joints 3mm or less in width will be grouted with approved cementations grout.
Upon completion of the work, all surfaces of glazed tiles will be properly cleaned
Granite & Ceramic Floor & Wall Tiles
Tiles work will not start until the plumbing, electrical works and other trades have been completed and tested.
The tiles should be protected before the start of any other activities in the area.
Granite floor and wall tiles will be of first class quality, of uniform size and even surface, free from warps, chipped corners and other imperfections affecting on quality.
The contractor shall use the design mix mortar after getting the owner approval.
Colors and quality will be subject for approval of the owner.
Wall Tiles Installation
Scratch coat will be applied to masonry as backing for wall tiles.
Make grove in back of tiles to fix galvanized steel wire.
Fix tiles aligned according to approved shop drawing using gypsum patches.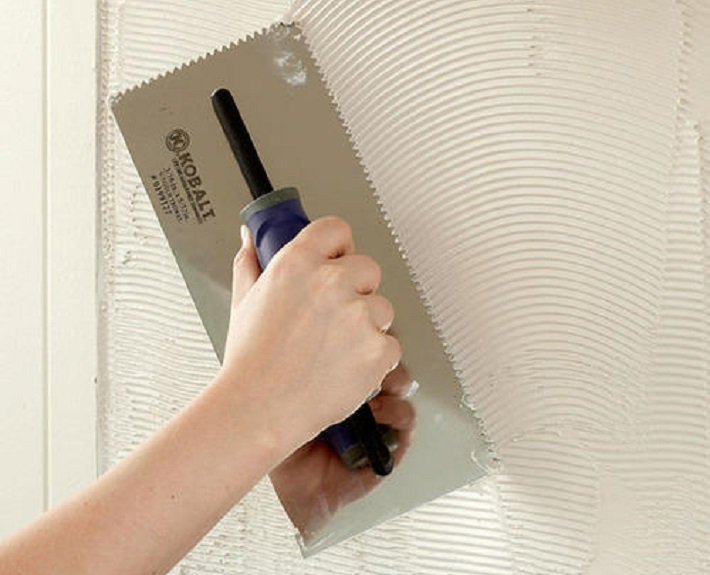
Start grouting space between tiles and masonry wall using rich cement mortar.
Continue grouting successively every day until reaching full height wall.
Cleaning of temporary gypsum patches to be done.
Floor Tiles Installation
Surfaces will be cleaned under granite floor tiles.
Provide clean sand under granite floor tiles.
Tiles will be installed using approved mix design mortar.
Squaring the room is needed before starting.
Set the tiles onto uniform position.
Check the level of tiles using spirit level.
Restrict access when tiles are freshly laid.
Glazed and Non-Slip Ceramic Tiles
Surfaces will be cleaned
Floor tiles installation will not start until wall installation has been completed.
Before tiles installation, the structure floor will be tested for levelness or uniformity of slope if the floor is found defective; it will be properly corrected to attain the required slope.
Tiles will be soaked in clean water for about 1/2hour before setting them.
Squaring of room needed before starting.
Provide clean sand under ceramic tiles.
The tiles will be installed using approved mix design mortar.
Setting tile onto uniform position. Use plastic spacers for uniform spaces between tiles
Check level of tiles using spirit level.
Restrict access when tiles are freshly laid.
Acid Resistant Ceramic Tiles
Surfaces will be cleaned.
In the battery room the floor finish will be 6mm min. thick.
Non-slip alkali resistance ceramic floor tiles with a low surface permeability.
Squaring of room needed before starting
The tiles will be bedded on alkaline resistance adhesive
Setting tile onto uniform position, using plastic spacers for uniform spaces between tiles.
Check the level of tiles using spirit level
Restrict access when tiles are freshly laid.
FALSE CEILING PROCEDURE
All material will be delivered to the site in unopened containers with brand name and type clearly marked.
Carefully handle and store materials in dry enclosures.
False ceiling materials will be of the best quality and obtained from a single manufacturer approved by the owner.
The contractor will be submitting shop drawing to the owner for approval.
The surveyor will mark the exact location for perimeter angle on the wall.
Hangers will be installed above the main beams typically every 1.20 meter.
Install main beam 360 every 1.20m.
Install cross tees 60&120 every 0.60m.
Before installing the ceiling tiles the contractor will make sure that all mechanical, electrical, communication and fire items have been installed, inspected and tested.
PAINTING WORKS
Painting work will not be started until the electrical, HVAC embedded works and other trades have been completed and tested.
Paint materials will be of the best quality available and will be obtained from a single manufacturer approved by the owner.
All materials will be delivered to the site in unopened, sealed and labeled containers of the paint manufacturer.
Colors will be as shown in a painting color schedule to be approved by the client.
Paint Application Procedure
All surfaces will be cleaned
Hardware, electrical fixtures and similar accessories will be removed or suitably masked during preparation and painting operations.
Priming will be done after cleaning the surfaces.
Putting of new walls and putting of cracks and minor surface defects will be done after the priming coat has been applied and has dried properly
Paint will not be applied to wet or damp surfaces
Paint will be considered dry when an addition coat can be applied.
The finished surfaces will be free from drops, sags and brush marks and exhibiting good coverage.
Discover more from Project Management 123
Subscribe to get the latest posts sent to your email.